GNSS Repeaters – Why We Want to Know Some Details About Your Installation Site
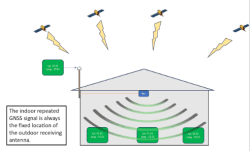
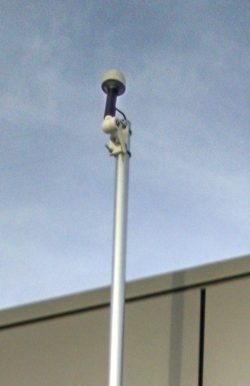
When planning to install a repeater to bring the GNSS signals indoors it is important to plan the installation thoroughly. The outdoor receiving antenna must be installed in a location with an unobstructed view of the sky and the satellites, and the antenna should not be installed near any equipment that may cause interference such as HVAC equipment or other equipment with powerful electric motors, or near other transmitting antennas. If your roof material is metal, you should install the antenna in top of a mast or tripod that extends ~ 2 m (~ 6.5 ft.) above the roof level. This is recommended as you may otherwise experience a so-called multipath effect resulting in radio signals reaching the receiving antenna by two or more paths which can cause serious enough interference to render the repeater non-functional because it does not receive a strong enough signal. Another reason to raise the antenna from the roof level is the potential for the antenna becoming covered by snow during winter months in locations where snow accumulation occurs.
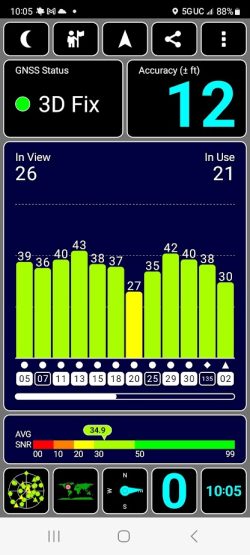
We recommend checking the outdoor GNSS signal reception at the location that has been chosen for the outdoor receiving antenna before installing it. This can be done with a GNSS receiver or with a mobile application such as GPS Test or similar (see screenshot of application to the left). After securing that the chosen location gets a good GNSS signal the next step is to measure the cable route distance from the antenna location to the intended indoor repeater location. Remember that the cable route most likely is much longer than if measuring straight from antenna location to repeater location as you must follow cable ladders/trays and conduits for cables. When you know the required cable distance, we can calculate the so-called link budget to determine what type of coaxial cable or possibly fiber optics to use. The link budget calculation is used to determine the received power, to ensure that the information is received intelligibly with an adequate signal to noise ratio (SNR). The complete plug-and-play ROGER-GPS kits come with a 50 Ω coaxial cable assembly of the type 195 in either 20 m (~65 ft.) or 40 m (~ 131 ft.) length. Type 195 references the outer diameter of the coaxial cable jacket (0.195” or 4.95 mm.) When distances are longer than 40 m (~131 ft.) a thicker (higher grade) coaxial cable must be used, and we typically use either type 240 (0.240” or 6.10 mm) or type 400 cables (0.405” or 10.29mm) depending on what the link budget requires. All coaxial cable assemblies delivered by us are equipped with pre-installed connectors and heat shielding, but we recommend covering all connectors that are outdoors or subject to moisture with 3M ™Temflex™ or similar tape to protect against moisture intrusion and corrosion. In extreme cases when the cable distance is over ~ 100 m (~ 328 ft.) amplifiers or optical fiber must be used to distribute a strong enough signal from the antenna to the repeater.
Antenna Types
We typically use either Tallysman or Trimble antennas and our plug-and-play kits include a Tallysman antenna with a gain between 35 – 40 dB. The antennas are so called “active antennas”, in another word an antenna that includes a low noise amplifier (LNA), so the antennas require power. The DC power for the antenna is distributed through the coaxial cable from the repeater which provides 5V DC from the RF connector. We recommend installing a Lightning Protection Kit right after the outdoor receiving antenna, and our optional kits come with everything included except the ground wire.
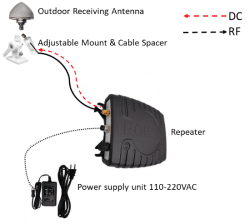
When the antenna has been installed the next step is to route the coaxial cable from the outdoor antenna to the repeater indoors by following existing cable ladders/trays and conduits or if these are nonexistent by routing the cable in such a way that there are no sharp corners or chances for the cable to become damaged by mechanical force. The coaxial cable should never be rolled up in a coil if you happen to end up with more cable than required. If that is the case it is better to cut the cable to the required length and re-terminate it with a new connector, or the second-best option is to route the cable so that all the cable is used up on the way from antenna to repeater.
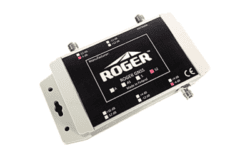
The following step is to mechanically install the repeater either in the ceiling pointing towards the floor below or if you have limited free ceiling height it may be better to install the repeater on the wall pointing in the general direction where signal coverage is required. This is why we always ask you about the free ceiling height in the premises where GNSS signals are required. With that information we can calculate the approximate signal coverage area and recommend which installation alternative likely will work better for you, or whether you possibly need more than one repeater to cover the required signal coverage area.
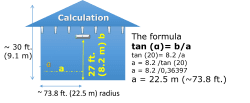

When selecting the location for the repeater keep in mind that you need to maintain line-of-sight from repeater to receiving devices as even very flimsy objects will block the weak GNSS signal. If installed on the wall you can most likely get improved signal coverage by using an adjustable wall mount that enables pointing the repeater in the most optimal direction. You must have an electrical outlet available near the repeater and it is recommended that this outlet is surge protected and behind a switch so that you can easily switch the repeater on and off if necessary.
These are the main steps involved in installing a GNSS Repeater and this description has been provided to clarify why we do not make it possible to order any of the equipment on our website and why we ask a few questions before quoting any equipment or kit. In some cases, either more than one repeater, amplifier(s} and/or splitter(s) will be required, or the distribution from antenna to repeater must be completed using fiber optics where you can have distances of several kilometers (thousands of feet). The Fiber Optic solution requires additional GPS over Fiber equipment.
Once your repeater kit has been plugged in and the gain adjusted, you’ll have the same GNSS live signal indoors as you have at the outdoor antenna location.

